Why Is My New Sod Turning Yellow? Causes, Fixes, and Lawn Care Tips
Just installed a lush, green carpet of turf, only to see it turn yellow? You’re not alone.
Watching your brand-new sod turn yellow can be frustrating, especially after investing time, energy, and money into your new lawn. This article will guide you through the most common reasons your new sod might be turning yellow or brown, how to fix it, and — most importantly — how to prevent yellowing sod from the start. Whether you're a DIY homeowner, a new gardener, or just someone who stumbled upon a lawn care forum, this guide is packed with answers.
You’ll learn what causes yellowing sod, how to create the ideal watering schedule, how nutrients affect your turf, and when to call in a landscaper. Let’s dig into the reasons your new sod looks yellow and how to bring back that lush green lawn you dreamed of.
Why Is My New Sod Turning Yellow So Soon After Installation?
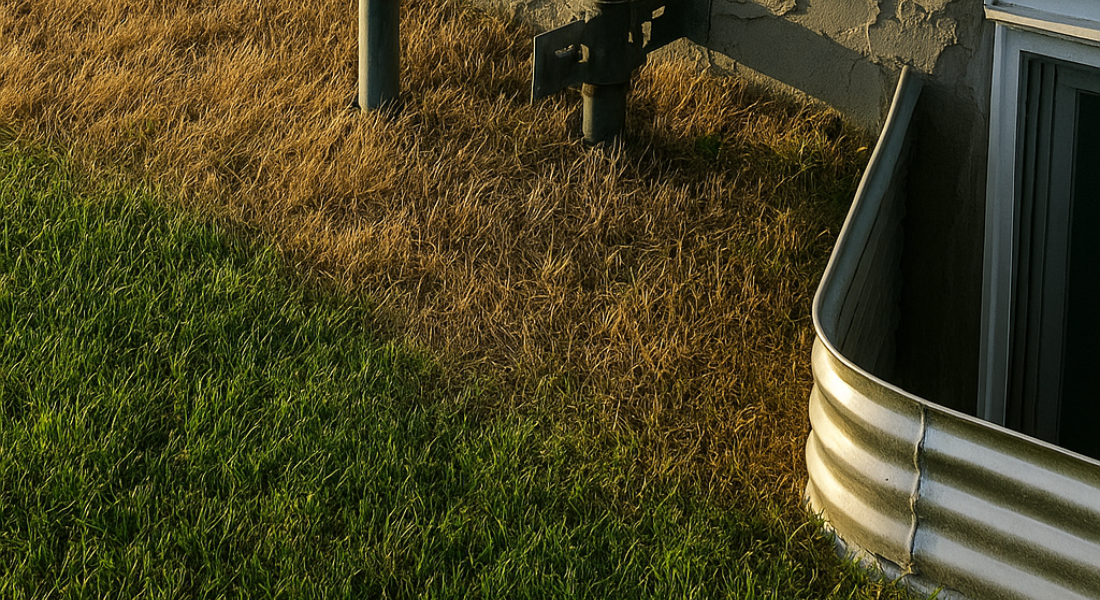
Yellowing right after installation is usually related to water.
When sod is turning yellow just a few days after being laid, it often means it’s not getting the right amount of water, either too much or too little. Both can burn the roots or prevent them from establishing.
Sod requires water to penetrate the soil and reach the roots, especially during the first few weeks. If your new sod turns yellow in patches or all over, it may not be absorbing the water evenly. Also, sod laid during intense summer heat may dry out faster than expected.
Tip: Water every morning, especially during the first two weeks, to keep the soil moist but not soggy.
How Much Water Does New Sod Really Need?
New sod needs more water than an established lawn.
Immediately after installation, freshly laid sod should be watered enough to keep the sod consistently moist. A good rule is to water once or twice a day for the first 7–14 days. This ensures water can penetrate the soil and help the roots establish.
But too much water can also cause yellowing. Overwatered sod may look soggy, soft, and even smell bad. It’s important to find the balance — your new sod needs the right amount of water, not just more water.
Tip: Use about an inch of water per day, gradually decreasing to watering every three days as the roots take hold.
Can Overwatering Cause New Sod to Turn Yellow or Brown?
Yes, overwatering is a common cause of yellowing sod.
It’s tempting to drown brand-new sod in water, thinking it’ll grow faster, but this often leads to a brown patch of bare dirt beneath the surface or yellow or brown blades on top. When water pools or runs off, it doesn’t reach the roots, and the roots may rot from lack of oxygen.
If your sod receives water but still turns yellow, it’s time to adjust your watering. You might be applying too much, too frequently.
Tip: Check if the sod looks spongy or waterlogged. Reduce frequency and allow the soil to breathe.
Could My Yellowing Sod Be a Nutrient Issue?
Nutrients play a major role in keeping your lawn green.
If watering seems fine but your sod can turn yellow anyway, it may lack essential nutrients like nitrogen, potassium, or iron. Without these, even quality turf will lose its color and vibrancy.
Performing a soil test is the best way to identify deficiencies. Once you know what's missing, fertilizer will help correct imbalances and revive your yellow grass.
Tip: Always wait at least a month before you fertilize new sod. Fertilizing too early can burn the roots.
Why Does My Sod Look Yellow in Patches?
Uneven watering or soil conditions can result in patchy yellow turf.
Yellow patches may appear where water isn't reaching the roots evenly — possibly due to compacted soil, poor grading, or inconsistent sprinkler coverage. In other cases, areas of the turf grass might be competing for nutrients or affected by underlying debris or rocks.
Also, if the sod installed wasn’t properly staggered or pressed into the soil, air pockets can form, disrupting root growth.
Tip: Walk your new lawn and check for sponge-like spots or dry patches. Adjust sprinkler heads or level the soil as needed.
Could Pests Be the Reason My Sod Is Turning Yellow?
Yes — insects and grubs can damage sod before it roots.
Pest problems can be hard to detect in the first few weeks. Grubs feed on the roots, while chinch bugs suck moisture from the blades. Both can result in yellowing patches and root dieback.
Early infestation is more common in areas with a history of pest problems or where sod was laid within poorly maintained soil.
Tip: Peel back a section of the freshly laid sod and inspect underneath for larvae or insects. If you find signs, a licensed landscaper or pest control specialist can help.
Does the Time of Year Affect Whether Sod Turns Yellow?
Hot summer months or freezing conditions can stress new sod.
When you’re waiting for installation, try to avoid extreme weather. Sod laid in summer heat needs significantly more water, while sod laid in winter might struggle to grow roots in cold soil.
The day it was laid sets the tone for the establishment. If installed during a heatwave or heavy rain, your new sod may face extra challenges in staying green.
Tip: For best results, install sod in spring or early fall when temperatures are moderate and moisture levels are ideal.
Can Fertilizer Help Restore My Yellow Sod?
Yes, but timing and type matter.
Using the wrong fertilizer or applying it too early can harm new sod. However, the right product used at the right time will strengthen roots and encourage new growth and color.
As mentioned earlier, it’s best to wait at least a month before fertilizing. Then, choose a starter fertilizer high in phosphorus, which supports root development.
Tip: If your sod is turning yellow weeks after installation and watering is on point, a balanced nutrient boost may be just what it needs.
Is My Yellow Sod Salvageable or Should I Replace It?
Most yellowing sod can be saved with proper care.
If your new sod turning yellow isn’t too far gone, don’t panic. Often, the issue is shallow roots, and the turf just needs time to adjust. However, sod that stays yellow despite a corrected watering schedule and nutrients may be beyond saving.
Try to identify the root issue before giving up — be it water, fertilizer, pest, or soil compaction. Healthy roots lead to healthy blades.
Tip: Yellow doesn’t mean dead. With some patience and proper care, sod recovery is possible.
How Can I Prevent My New Sod from Turning Yellow Again?
A good lawn care plan is key to keeping your grass lush and green.
To keep the sod green after installation, be proactive. Use a set watering schedule, do a soil test, apply fertilizer only when needed, and monitor for pest activity.
Join a forum community dedicated to lawn care or a lawn care forum to share experiences and learn from others tackling sod yellowing. Even experienced homeowners run into trouble, but they also bounce back.
Tip: Prevention is always better than repair. Create a checklist to ensure your new sod from turning yellow stays a vibrant green.
Need Help with Yellowing Sod? We’ve Got You Covered!
If your new sod is turning yellow, don’t worry — GreenLife Services can help! We specialize in sod installation and know how to keep your lawn green and healthy. Whether the problem is too much water, not enough nutrients, or yellow spots that just won’t go away, our team has the experience to fix it. We proudly serve Clarksville, Montgomery County, Sango, Woodlawn, and nearby areas with expert lawn care you can count on.
Call us at (931) 228-8680 for a free quote and let us bring your lawn back to life!
🔍 Summary: Keep Your New Sod from Turning Yellow
Here’s what to remember when you spot your new sod looking yellow:
- Yellowing is common, especially right after installation. Don't panic.
- New sod needs more attention and water than an established lawn.
- The right amount of water is critical. Avoid overwatered or dried-out sod.
- Water once or twice a day for the first week or two, then taper off.
- Check for pest activity under the sod.
- Perform a soil test to check for nutrient deficiencies.
- Wait to fertilize until about 3–4 weeks after installation.
- Avoid installing in summer heat or freezing weather.
- Yellow sod is often salvageable with prompt care.
- Join a lawn care forum or connect with a landscaper for extra help.
With a bit of observation, some timely watering, and the right lawn care strategy, your yellowing sod can bounce back into a lush and green paradise.
FAQs
Q. Is it normal for new sod to be yellow?
A. Yes, it’s fairly common for new sod to appear yellow shortly after installation — but that doesn't mean it's ideal. Yellowing can result from stress during transport, insufficient watering, or a delay between harvesting and laying the sod. It can also happen if the sod receives too much water or too little soon after it's installed. Fortunately, with proper care, including a consistent watering schedule and appropriate nutrient support, most yellowing sod can bounce back to a lush green color.
Q. Is it normal for new turf to go yellow?
A. Yes, new turf (sod) turning yellow can happen during the establishment phase. The turf grass goes through a transition period as it adapts to the soil beneath it. Factors like overwatering, lack of nutrients, or exposure to summer heat can all cause yellowing. While it's normal to see some color change, extended yellowing could indicate deeper problems like pest damage or compacted soil. Early attention ensures the sod is turning green again soon.
Q. How to make new sod green?
A. To help your new sod turn a vibrant green:
- Water properly: In the first two weeks, water the sod twice a day to keep the soil moist, not soggy. Avoid overwatered sod by ensuring water can penetrate the soil and reach the roots.
- Wait to fertilize: Don’t rush to add fertilizer. Wait at least a month, then use a balanced, slow-release formula high in phosphorus for new growth.
- Do a soil test: If you're still seeing yellow or brown grass, test for nutrient deficiencies.
- Watch for pests: Lift a corner of your sod and check for insects that might be damaging the roots.
With the right amount of water, nutrients, and sunlight, your new lawn should soon transform into a healthy green space.
Q. How to fix yellow spots on sod?
A. To fix yellow spots on sod:
- Adjust watering: Make sure you're watering deeply enough for moisture to reach the roots, but not so much that the area becomes soggy. Uneven watering is a top reason for yellow patches.
- Aerate compacted areas: If the soil is hard, roots can’t establish. Loosen the soil to let air, water, and nutrients in.
- Check for pests or fungus: Dig into the affected area and look for larvae or mold. Treat accordingly with pest control or fungicide.
- Apply nutrients: After 3–4 weeks, use fertilizer to support healthy lawn recovery.
Yellow doesn’t mean dead — sod may just need a bit of help to recover and return to that lush green lawn you’re aiming for.
